Introduction to HTML and your first website
Welcome to the first lesson of an online course on creating simple websites. HTML is the foundation for creating websites. It is very simple in itself and all websites use it. More complicated HTML sites mix with several other languages, some of which are also shown in the series. We'll go through the very basics of HTML and create our simple first pages that we place on the Internet.
Editor
We will not use a notepad to write HTML code because it lacks many features. These include, in particular, clear code highlighting. Let's download some smarter editor. To get started, just use the PSPad editor, if you don't have it, download it and install it. For more serious projects, so-called IDE is needed. I highly recommend the JetBrains IDE. For HTML, WebStorm or PhpStorm is useful if you plan to work in PHP later.
Let's run PSPad and select UTF-8 in the Format section in the menu above.
This has set the encoding method. UTF-8 encoding is used for all correctly written sites. Unfortunately, Windows does not use UTF as the default encoding, so it's not the default in PSPad. It is very important that you edit your site only in editors that support UTF-8, otherwise the diacritics will break. For example, it is a bad idea to create pages in PSPad and then write them in Notepad.
First web page
HTML page is very easy to create, it's actually just a text document. Create a new file (File Menu -> New) and select HTML as the file type.
We have created a new HTML page. PSPad has already prepared some code for us, but we will not use it, so delete all the text and write it again.
HTML consists of tags. In itself, it mainly allows the elements (the elements) on the page to have a certain meaning, and that is also its main task. Previously, it was also used for graphical page styling, but because the created sites were confusing, it was limited to web content only.
Tags are used to wrap text and give it some meaning (eg this is important text, this title, list, table). Tags are written in pointed brackets. A very specific tag is a link that allows you to navigate between pages to link them. Hence the abbreviation HTML (Hyper Text Mark Up Language).
The HTML file has a certain structure. Insert the so-called doctype at the beginning of the file:
<!DOCTYPE html>This defines that the text file is an HTML document. Do not pay attention to the exclamation point, it just writes there :) Next we define the HTML document itself. It is divided into 2 parts - head and body. The header contains information for the browser and search engines, the body of the web page itself.
Let's modify our file to look like this:
<!DOCTYPE html>

<html lang="en-US">
        <head>
        </head>

        <body>
        </body>
</html>
On the next line, we open the html tag, telling us where our HTML page will start here.
The following is a header that is inserted in the <head> tag. Note that the end of the header differs from the beginning with a forward slash. This is how paired tags are written. Paired because there are two (beginning and end) and between them is inserted their content, here the header content. It is the same with the body (tag body), where we define its beginning and end with a slash. Finally, we close the HTML page itself.
At the beginning of HTML, note the lang attribute that defines the language of the page. An attribute is any extension information to a particular HTML element. Here he says that the HTML page is in English. Attribute values are written in quotation marks, and we will return to the attributes.
Let's move to the header and insert encoding information between its beginning and end. This is done by the meta tag with the following syntax (notation):
<meta charset="utf-8" />Note the slash at the end of the tag, this terminates unpaired tags, ie those that do not have 2 parts (start and end), but are written only once. These include the meta tag. For each tag, during the series we will tell whether it is paired or unpaired. We set the encoding to UTF-8.
Add a caption to the header as the next line. This is a paired tag named title, inside the tag we write the title text.
<title>My First web page</title>Your entire HTML document should now look like this:
<!DOCTYPE html>

<html lang="en-US">
        <head>
                <meta charset="utf-8" />
                <title>My First web page</title>
        </head>

        <body>
        </body>
</html>
The header is already filled, now let's move to the body ( <body> ), which is the part of the page that is visible in the browser.
We insert two paragraphs of text into the body. We'll use a paired <p> tag (like paragraph = paragraph) to do this. In HTML, everything is like an element, even the text here can not just float, but it must be wrapped in individual paragraphs.
<p>This is my first web page</p>
<p>This is second paragraph</p>
Create a folder on your hard disk (eg First Page) to save the file. Call it index.html when saving it.
Your entire HTML document should now look like this:
<!DOCTYPE html>

<html lang="en-US">
        <head>
                <meta charset="utf-8" />
                <title>My First web page</title>
        </head>

        <body>

<p>This is my first web page</p>
<p>This is second paragraph</p>

        </body>
</html>
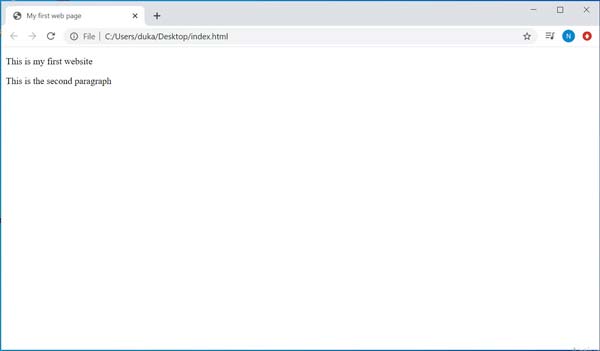
Now when you open the file in a web browser, you should see your first site. It will look like the picture below :) If it doesn't look like it, don't worry and download the finished site file at the end of the article. You can see where you made a mistake.

In the next lesson, Basic HTML Tags, we will list the additional tags you will need for your site.
Download index.html (In Zip format)